Application Editor Components
The first time you start Application Editor, you are presented with a blank work space in the Application Editor window. One can add multiple objects to Application Editor, which are described below:
Groups
A single program together with its input and output files is treated as one entity in Application Editor and a collection of programs or objects 'grouped' together form an 'Application Group' or simply 'Groups'. An object is either a program box or another Group itself. A single group can contain a maximum of 30 programs or other groups. One needs groups in the project so that they can organize the modeling steps of the project effectively and let modelers understand the flowchart structure.
To launch a group, open a Application and click on 'Group' from the toolbar.

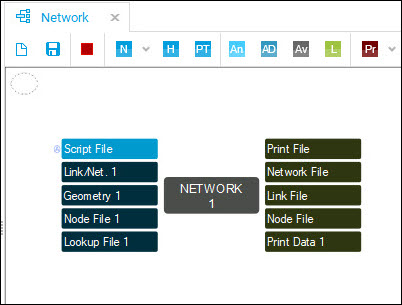
Give a name to the Group and Click 'Add'. The Group will appear as a box in the application and an automated Execution order will be assigned to the group which can be changed later. Double-click on the Group and it will open a blank application file. Add a program box to the blank application file to start building the model. For reference, see below image.
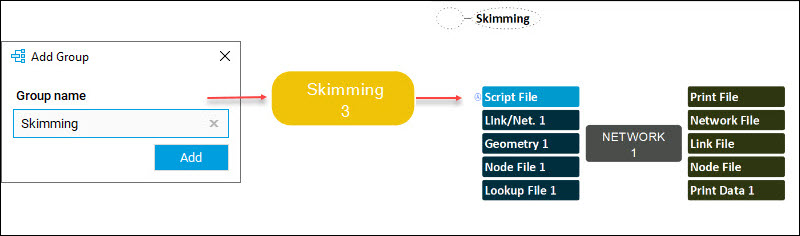
If a group is added and the application or project is saved, the folder structure of the application also changes. A new folder within the parent application will appear in file explorer. E.g., if 'Skimming' group was created, then a 'Skimming' folder is created under the parent application. All the programs added to this folder will be saved in the new folder structure. For reference, see below image.

To Run a group or check Group properties, please refer to the respective sections.
Program
To add a program to an Application, select a program from the Application Editor toolbar.

A program box will appear in the middle of the screen.
On the left side of the program box you will find the input files that this program can use. On the right side you will see the output files that can be created by the program.
The program box is just a representation of the program you want to run at a later stage. This means you can have several program boxes up on the screen simultaneously. You can even have several instances of the same program on the screen at the same time.
If you choose more than one program from the toolbar, you need to move the program box away from the middle of the screen so that each program box can be viewed and manipulated individually. You can move a program by dragging the center of the program and place it anywhere else on the empty space of the Application. The background canvas will automatically adjust its width and height to accommodate the placements of the program boxes.
The file boxes are, in the same manner as the program box, just representations of the files actually stored on the hard disk. This means you can have several file boxes representing the same physical file. As the file boxes for a program are the actual input/output files used when the program is run, some or all of the file boxes will need file path names. Refer to the File Management and Naming for information on naming files.
Loop/Branch
Scopes
CUBE 7 introduces the concept of 'Scopes' which replaces the 'Public Files' from earlier versions of CUBE. In earlier versions of CUBE, any input/output file which was made Public was only available at the immediate parent application but Scopes offers to view all the files from any groups to anywhere else in the application.
Working with Scopes
In earlier versions of CUBE, one would right-click on a file and make 'File Public'. In CUBE 7, one needs to right-click and add a file to a 'Scope' using Scope Management.
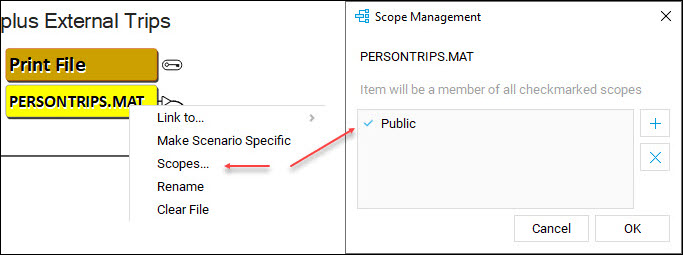
To add a file to scope, right-click on a file > click 'Scopes' > and add to default Public scope category. See below:
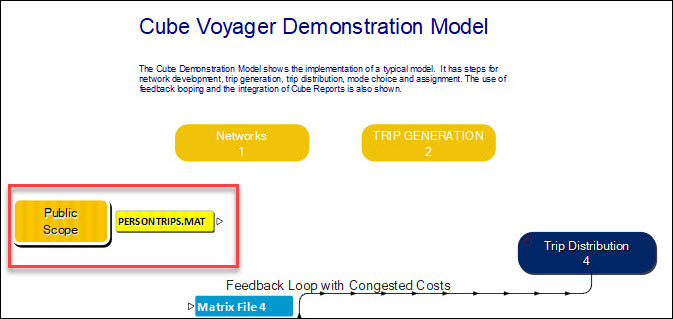
When a file is added to a scope, the scope appears automatically to all applications and groups in the project. One can then connect or use that file to connect to anywhere else in the application by creating a link. See below on how a Public Scope would appear automatically.
Scopes Category
When working with scopes, it is possible to add a file to a specific category of Scopes instead of default Public. To add a file to a scope, right-click on a file > Click Scopes > Click + to add a scope > give a name of a scope > Click Add. The specific category will be added and be available under the Scope Management. This way users can organize their scope files of 'public' files efficiently. E.g., all scope files in a given group can be grouped together and called anywhere else.

Unlike Public Scope which appears automatically at all levels in the application, all custom or categorical scopes need to be added manually to a given application or group. To add a custom scope, right-click on the empty space of Application > click Add > click Scopes > and check the custom Scope > and click OK. The specific scope will then appear in the given application or group. See below for reference.
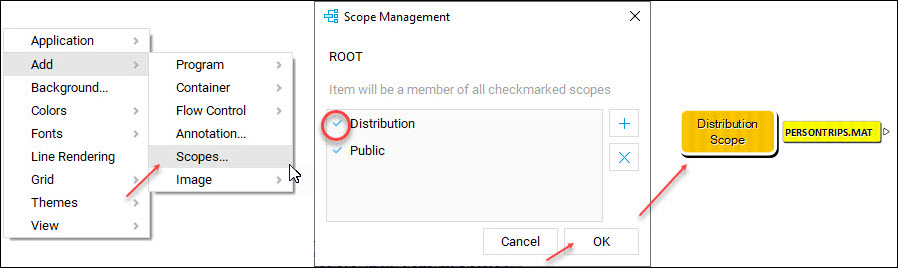
When a custom scope is added, then all scopes including Public Scope will appear on that level of application. See below for reference.

Blocks
CUBE 7 introduces Block in the Application Editor. The block help the users in the following ways:
- Quicker way to move a group of programs in an Application or Group
- Quickly create a Group (sub-group of an application)
- Ability to run a Group or an Application partially (without running the entire group)

Working with Blocks
To create a Block, open Application Editor, Click on 'Block' from the toolbar. A new object called 'Block' will appear on the screen. As per the instructions, Move and re-resize it using the left/right/corners of the Block. When Block is created as desired, right-click inside the Block and it will be fixed. When a block is completed, it will automatically attach all the programs inside it to itself. Then moving the block will move all the programs within it together.
Below is an example of how a Block appears when created within a Group or an application.

Note: When finishing creating the Block, do not right-click outside of the Block. One needs to right-click inside the Block.
Resizing
To re-size a Block, simply use the left/right/corners to re-size and it can be either made bigger to include more programs or smaller to leave out some of the programs.
Creating Group from Block
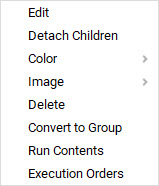
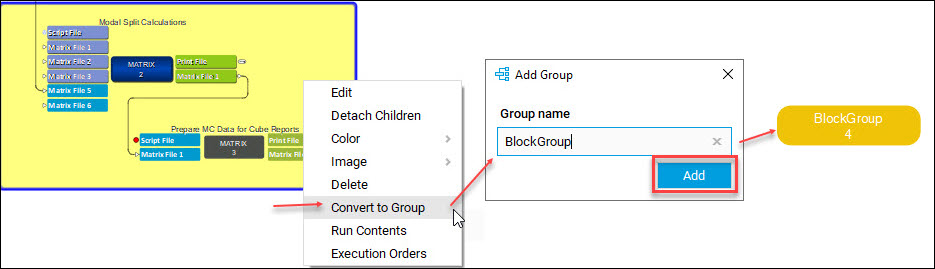
Block provides the ability to quickly create a new Group within a given Application. To create a Group, right-click on Block and click 'Convert to Group'. A Prompt will appear to give a name to the new Group. Click Add to create a new Group. See Below:
Running a Block
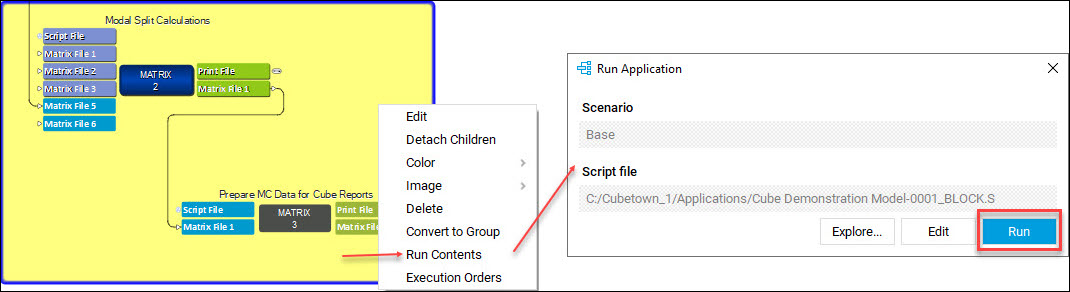
Block provides the ability to select partial set of programs in a group or application and run it instead of running the full set of steps in the group. To run a Block, right-click on Block and Click 'Run Contents'. This will launch a partial script for the Block and click 'Run' to run the contents. Application Run Monitor will then appear where you can track the progress of the block run.
Detach Children
To remove the programs from a given Block, right-click on the Block and click 'Detach Children'. This will remove the connection between the Block and the programs inside it. Re-size the Block to cover new set of programs.
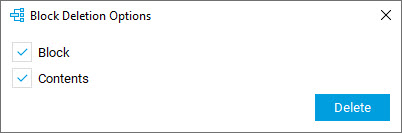
Deleting a Block
To delete a Block, right-click and click 'Delete' and it will prompt with a message if you want to delete only the block or you want to delete the contents of the block itself. Select the desired option to finish deleting block.
Block Properties
Other than above options, you can right-click on Block and select Color to change the color of the Block or select Image to load a background image for the Block itself.